How To Transfer Photos From iPhone To PC
How to transfer photos from iPhone To PC. Many iPhone users ask themselves: how do I transfer photos from my iPhone to my computer? Do you want to know how to move images from your iPhone to your computer? Fortunately, there are several easy methods for transferring images from an iPhone to a computer. In this post, you’ll discover how to quickly copy images from your iPhone to your Windows PC.
USB Vs Wireless How To Transfer Photos From iPhone To PC
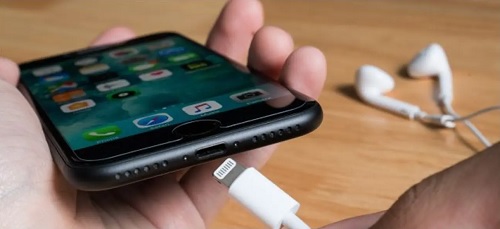
You can transfer images from your iPhone to your PC in one of two methods. One option is to use a USB cable to transfer images. You’ll need your iPhone charger cable to transfer your images this way. Connect one end of the cable to your iPhone and the other to a computer’s USB port.
Wireless photo transfer from iPhone to Windows is also possible. There are no cables necessary. To transfer photos, you’ll need to be connected to Wi-Fi. You’ll also need an iCloud account from Apple (which will be discussed later).
How To Wirelessly Transfer Photos From iPhone To Computer
Wirelessly transferring your iPhone images to your Windows PC can be done in two ways. An iCloud account is required for either type of photo transfer. Apple’s iCloud is a cloud storage service. You can use it to upload photos and videos from your iPhone to your iCloud account. The photographs from iCloud can then be downloaded to other devices.
When you originally purchased your iPhone, you should have created an iCloud account. You get 5GB of free storage with iCloud. If you shoot a lot of images, though, you should probably upgrade to 50 GB (and there are options to upgrade to 200 GB and 2 TB, as well).
Do you want to know how to use iCloud Photos to transfer photos from your iPhone to your computer?
To begin, turn on the iCloud Photo Library on your iPhone. Select iCloud Photos from the Settings menu, then Photos (or iCloud Photo Library, depending on your device).
How To Use iCloud Photos To Transfer Photos From An iPhone To A Computer
When you take a photo, it will now be automatically posted to iCloud (as long as you have Wi-Fi).
Second, install the iCloud for Windows application on your computer. Download and install iCloud for Windows on your computer. After that, sign in with your Apple ID (this is the same Apple ID you use for your iPhone App Store account).
On your PC, launch the iCloud for Windows software. Make sure you check the box next to Photos. Then tap the Options button that corresponds.
Choose iCloud Photo Library from the drop-down menu. Then choose Download new photographs and videos to my PC from the drop-down menu. Check Upload new images and videos from my PC if you want new photographs and videos from your PC to automatically upload to your iCloud Photo Library.
After that, click Done. Then press the Apply button.
When you have Wi-Fi, any new images you shoot with your iPhone will now automatically transfer to your PC. Open your File Explorer to get photos that have been downloaded via iCloud (known as Windows Explorer on Windows 7 devices). On the left side of the screen, select This PC (or Computer on Windows 7 devices). Double-click iCloud Photos to open it. Then, on Downloads, double-click. You’ll be able to see your iCloud photo folders here.
How To Use iCloud.com To Download Photos From An iPhone To A Computer
iCloud.com also allows you to download your iPhone images. You must first enable your iPhone to upload photographs to iCloud, just as you did with iCloud Photos.
To access iCloud Photos, go to Settings > Photos > iCloud Photos. You can now begin downloading images from iCloud.com to your PC. Go to iCloud.com using your computer’s web browser. Use your Apple ID and password to log in.
If your iPhone supports two-factor authentication, your PC will require you to enter a six-digit PIN.
A window will open on your iPhone at the same moment, showing that your PC has requested Apple ID sign-in. Allow should be selected. Your six-digit PIN will appear on the next screen. Put this into your computer.
If you want to continue using the same computer to access iCloud.com in the future, you may trust it. That way, the next time you sign in to iCloud.com, you won’t have to go through the authentication process. Go to iCloud.com and select Photos. You can now access your photo collection. It will be organized identically to your iPhone’s Photos app.
You can view your media by typing on the left-hand sidebar, or you can access your iPhone photo library albums. Choose any photos you want to save to your PC. Then, at the top of the screen, tap the Download icon (a cloud with a downward arrow). Your images will start to appear in your PC’s Downloads folder. Drag your photographs into the Pictures folder on the left side of the screen from here.
If you’re looking for more wireless photo transfer solutions, click here.
Using A USB Cable To Transfer Photos From An iPhone To PC
Do you want to know how to use a USB cable to transfer images from your iPhone to your computer?
Using a USB cord, you can transfer images from your iPhone to your Windows PC in a variety of ways.
You’ll learn the following in this article:
- How to get images from an iPhone to a computer using File Explorer/Windows Explorer
- How to copy photos from an iPhone to a computer using Windows AutoPlay
- How to get photos from an iPhone to a computer using File Explorer/Windows Explorer
If you have a Windows 8 or Windows 10 computer, you can use the Windows Photographs program to transfer your photos (also known as Microsoft Photos). On your computer, the Windows Photos software is already installed.
First, check sure you have the most recent version of iTunes on your computer. To do so, launch iTunes on your computer. Select Help from the drop-down menu. Then, under the Updates tab, click Check for Updates. To install the most recent version of iTunes, follow the on-screen instructions.
Using The Windows Photos App, Import Photos From Your iPhone To Your Computer
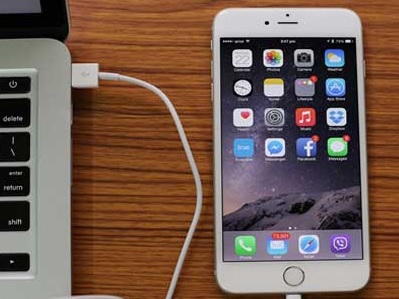
Then, using the USB charger cable, connect your iPhone to your PC.
On your iPhone, you may receive a notification asking if you trust your computer. It can also ask if you want to give it access to your images and videos. In either instance, you should state that you do. Then, when requested, enter your device’s passcode.
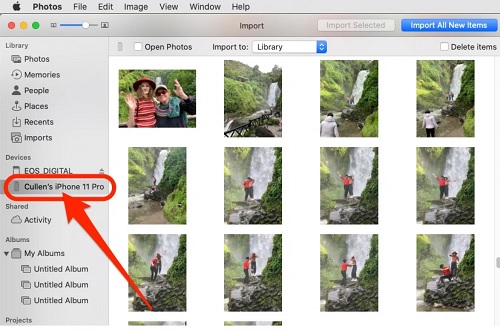
Open the Photos app on your PC. This can be found under the Start menu. You should be able to import your photographs from your iPhone to your PC once you’ve opened the Photos app. This option will be in the upper right corner of the Photos app on a Windows 10 PC. Right-click anywhere in the Photos program on a Windows 8 machine, and the option to Import will appear.
Import should be selected. Choose the goods you’d want to import. If you’re using a computer with Windows 8, click Import once more. Click Continue, then Import again on a Windows 10 PC. On some devices, instead of clicking Continue > Import, you can simply click Import Selected. Then your computer will start importing images from your iPhone to your PC right away.
The files from your iPhone will begin to transfer to your PC.
The photos will be in folders within your Pictures folder once your PC has completed importing them. They’ll be sorted by date automatically.
Using Windows AutoPlay, Copy Photos From iPhone To PC
You can’t use the Photographs app to transfer photos if you have a Windows 7 machine. What is the reason for this? Because there isn’t a Photos app on Windows 7 machines!
You may, however, use Windows AutoPlay to transfer photos from your iPhone to your PC.
To begin, plug your iPhone into your computer. When prompted, allow the iPhone to access your computer. Put your passcode in here. An AutoPlay window should appear when your iPhone connects to your PC. Select Import Photos and Videos from the drop-down menu (ensure you choose the option with Photos beneath it, rather than the Dropbox option).
All of your images from your iPhone will be imported and copied to your Pictures folder. They’ll be automatically arranged into date-based folders.
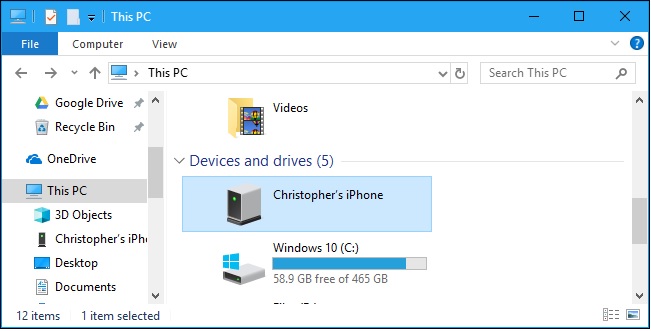
Another option to get your iPhone images onto your PC is to use File Explorer (known as Windows Explorer on Windows 7 devices). There are no programs required. To begin, plug your iPhone into your computer using the USB charger cable. Accept any permissions that your iPhone requests, and if prompted, enter your iPhone passcode.
Using File Explorer/Windows Explorer
Open File Explorer on a Windows 8 or Windows 10 computer. Your iPhone should be listed as Apple iPhone under This PC. On an Apple iPhone, double-click. Open Windows Explorer if you’re using a Windows 7 computer. Your iPhone can be found in the Computer section, titled Apple iPhone. On an Apple iPhone, double-click.
You’ll be brought to a folder titled Internal Storage after clicking on Apple iPhone (on Windows 7, Windows 8, and Windows 10 systems). To open it, double-click it. Double-click the DCIM folder to open it.
One or more folders will now appear. These are where you’ll find your photos (and other media, such as video files). They should be called 100APPLE, 101APPLE, 100CLOUD, 101CLOUD, and so on.
Click and drag to choose all of the folders on your iPhone if you want to copy all of the images. Then, on any folder, right-click. Copy is the option.
You must now paste these photo folders into your computer’s Pictures folder. On the left side of the screen, select Pictures. Select Paste from the context menu when you right-click on a vacant spot in the main window. Your photo folders will start to transfer from your iPhone!
After your photos have finished copying, double-click on the folders within the Pictures folder to access them. Make sure Apple iPhone is chosen on the left if you want to copy certain images from your iPhone. Then double-click the 100APPLE folder to open it (or any other media folder).
All of your iPhone images should now be displayed as thumbnails. You may now copy and paste photographs from the 100APPLE folder directly into your Pictures folder (or any other folder on your computer).
What Happens If Your Photographs Are HEIFs
Finally, your photos are HEIFs if their file extensions conclude.HEIC. This is a new image file format that iPhones support. You won’t be able to access your HEIF photographs using File Explorer/Windows Explorer on your computer. As a result, you’ll need to make sure that when you export your HEIF photographs to your PC, your iPhone converts them to JPEGs automatically.
To do so, go to your iPhone’s Home screen and tap Settings. Then touch Photos, and under Transfer To Mac Or PC, select Automatic. Write us a comment if you know some other information on how to transfer photos from iPhone to PC.